

Next: Measuring Circular Magnet Rings
Up: Shape Measurement and Defect
Previous: Comparison with Reference Measurements
Generalization to 3D Shapes
Some of shape defects can only be detected by true 3D measurements.
Major objections
against 3D measurements are slow data registration and
processing (more degrees of freedom), limited precision, and
the high cost of the equipment. Extension of the Hausdorff distance
based method to 3D is not straightforward, but still possible.
We are working on it now.
Preparations for direct 3D measurement of shapes have already
been made.
Pilot measurements (clouds of 3D surface point coordinates)
are already available. These measurements were carried out
using the 3-dimensional laser scanner REPLICA
produced by the 3D Scanners company.
REPLICA is a laser-based range scanner that yields
unordered lists of 3D points.
For illustration purposes, these outputs are
shown as shaded images of the 3D shapes.
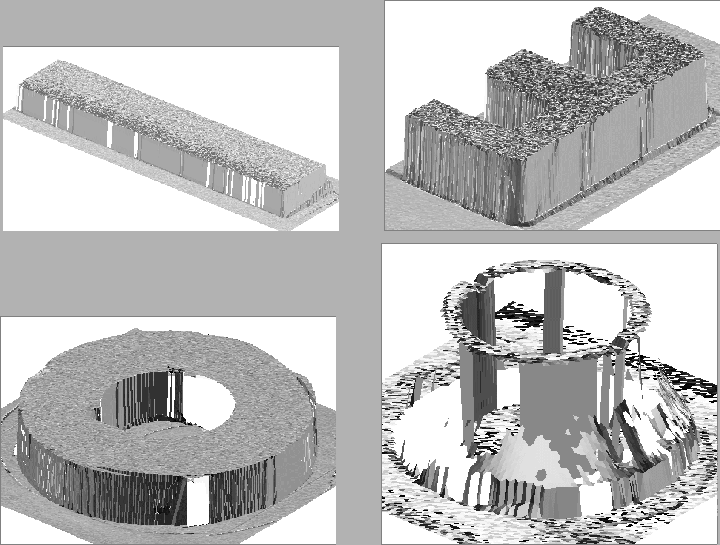
Some of the measurements obtained are displayed in figure 14.
Figure 14:
Examples of direct 3D measurements.
 |
The following problems of direct 3D coordinate measurement should be
addressed:
- Trade-off between resolution, speed and accuracy.
Small E-cores cannot be measured with the required accuracy, while
scanning a large object with suitable resolution may take tens of minutes.
- The measurements are quite noisy, depending on conditions such
as illumination and color and roughness of object surface.
- To make all surfaces visible, several measurements in different positions of
the shape are needed. Otherwise, surfaces perpendicular to the ground surface
are imprecise or even completely lost, as in the bottom right image
of figure 14.
- Ferrite cores and magnet are usually dark and absorb laser light,
which may deteriorate or even
completely destroy the measurements. To start the implementation and testing
of the 3D system, other test objects should be used that better reflect the
laser light. Alternatively, cores and magnets may be covered by a thin layer
of white powder.


Next: Measuring Circular Magnet Rings
Up: Shape Measurement and Defect
Previous: Comparison with Reference Measurements
Dmitry Chetverikov
1998-11-16
